

Outdoor Lighting Techniques: Installation Tips, Examples, and Best Practices
Understanding the nuances when designing and installing outdoor lighting can significantly impact the success of your projects. Properly executed lighting effects and techniques not only enhance the ambiance and aesthetic appeal of a property at night, but they also ensure functionality and safety. This guide covers various types of landscape lighting techniques, offering insights, examples and best practices for professional installers to implement.
The Basics
1. Uplighting
Overview:
This technique involves placing a fixture near an object and directing the light source upwards to illuminate it from below. Uplighting is commonly used to accent trees, gardens, walls, water features, pergolas or gazebos. This is one of the easiest outdoor lighting techniques to get started with, as well as a great add on for new and mature projects.
Installation Tips:
- Fixture Placement: Install the fixture strategically near the base of the target object (not too close).
- Angle: Adjust the beam’s angle as needed to ensure the light is covering the surface evenly without hot spots or harsh shadows.
- Spacing: To illuminate larger objects such as trees with wide canopies, install 2-3 fixtures around the base for a full and balanced illumination.
Best Practices:
- Use adjustable fixtures or mount accessories to accommodate different heights, angles, and applications.
- Go back to the job site at sunset / nighttime to adjust the placement and angle of the fixtures and eliminate unwanted shadows and hot spots.
- Aim to uplight other elements beyond the main outdoor space, such as surrounding landscape around paths, patios, and decks to add more layers and depth to a project.
Product Recommendations:
- Spotlights (Strata series).
- Recessed lights (Starke, Onyx, Ray).

2. Cross Lighting:
Overview:
Cross lighting involves using multiple fixtures to fully illuminate an object from different directions and angles. The goal of this lighting technique is to add even more depth and layers to a project and create a fuller/3D look. Cross lighting is ideal for highlighting complex features or larger elements of a space from all viewpoints.
Installation Tips:
- Placement: Install 2 or more fixtures strategically from opposing angles in relation to the target to ensure it is fully illuminated from all viewpoints.
- Angle: Adjust the angle of the fixtures as needed to achieve the desired light coverage and get rid of hot spots and/or unwanted shadows.
- Spacing: Spread out the lights and soften shadows by overlapping the light beams across the object.
Best Practices:
- To illuminate larger objects such as trees with big canopies, use at least 2-3 powerful spotlights with wider beams to ensure an even surface coverage.
- Don’t be afraid to use multiple fixtures to light up larger elements, doing this will ensure a full and balanced illumination from all viewpoints.
- Use shrouds/covers to diffuse the light source and eliminate glare.
Product Recommendations:
- Spotlights (Strata series).

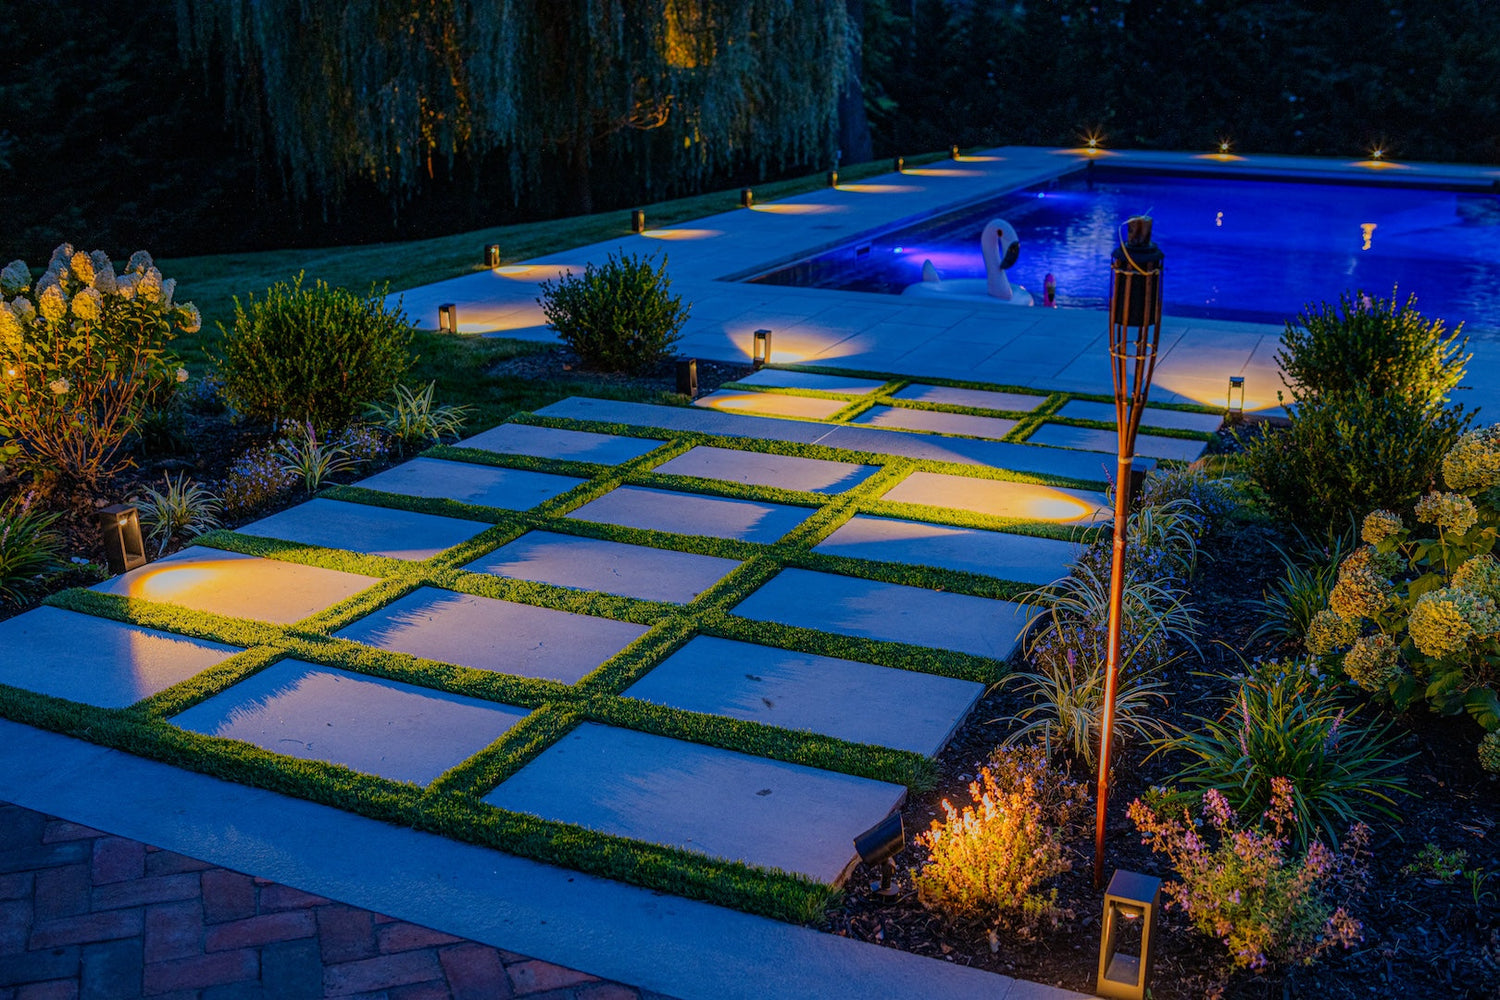
3. Path Lighting:
Overview:
This technique involves illuminating walkways and driveways by shining down or across them. The goal is to enhance the aesthetic of the space and increase visibility by highlighting uneven surfaces and transitions of the terrain. Path lighting can also be used to accent areas adjacent to a walkway or driveway, such as a garden, bushes or grasses. This technique is also very easy to get started with and to add on to in the future.
Installation Tips:
- Placement: Install fixtures along the edges of the path or driveway, staggering them at irregular intervals for visually pleasing results.
- Angle: Use adjustable or tiltable path lights with semi-covered light sources to achieve unique lighting effects and eliminate glare bombs.
- Spacing: Don’t place path lights too close together, the goal is to balance out the lights with the shadows enough to achieve a clear yet inviting path.
Best Practices:
- Match fixture shapes, styles, and finishes to complement the design of the space.
- Choose high-quality, durable, and weather-resistant fixtures suitable for outdoor conditions.
- Play around with the height, style, and beam angle of the path lights used to achieve dynamic designs.
- Angle the lights to illuminate beyond the path and accent surrounding elements like gardens and grasses to add more colors and depth to the space.
Product Recommendations:
- Path lights (Dax, Silo, Cube, Prism, Blaze, Silva).
- Wall lights (Dax Up Down, Hero, Dome).
- Spotlights (Strata S).

4. Step Lighting:
Overview:
This technique enhances the visibility, safety, and ambiance of hardscape, wood, composite, and/or concrete steps at night. Achieve this effect by installing lights into the riser or tread, or by installing lights along adjacent elements such as walls or railings to shine down or across the steps.
Installation Tips:
- Fixture Placement: Install recessed fixtures directly into the step riser. Install undercap fixtures under the step tread. Install wall and path lights along nearby walls and railings to shine down or across the steps.
- Angle: For recessed light applications, opt for semi-covered or diffused fixtures to prevent glare. For path and wall lights, adjust the angle down and outwards as needed to achieve the desired light coverage.
Best Practices:
- Use the proper tools, accessories, drills, and size bits recommended by the lighting manufacturer for a seamless installation.
- Opt for high-quality fixtures that will stand the test against time and moisture, rust, and dirt.
Product Recommendations:
- Undercap lights (Edge series).
- Recessed lights (Silo, Cube, Prism, Ruby Mini)
- Wall lights (Hero Mini & Dome Mini)
- Path lights (Dax, Blaze, Silva).

5. Recessed Lighting:
Overview:
Install fixtures flush to the ground or surface to achieve subtle and modern lighting designs. This technique is ideal to uplight elements from the ground-up without cluttering or obstructing the flow of a space. Recessed lights come available in different diameters, ring shapes and finishes to match the design and materials of a project.
Installation Tips:
- Fixture Placement: Use recessed lights to light up driveways and walkways, around pools, patios, decks, stair risers and outdoor kitchens.
- Angle: Use fixtures with diffused or semi-covered light sources around social areas like fire features, patios, and outdoor kitchens to prevent glare. Use brighter recessed lights to accent patio borders, pillars, walls, or fences away from direct eyesight.
Best Practices:
- Use the proper drill, tools, and drill bit sizes when drilling holes into pavers, concrete, wood, composite or stone.
- Use recessed fixtures with angled light sources to illuminate walls, hedges, fences, and gardens without glare.
- For softscape applications, use a ground stake accessory to push the recessed fixture directly into grass or mulch.
- Use conduit and drive over rated fixtures around high traffic areas.
Product Recommendations:

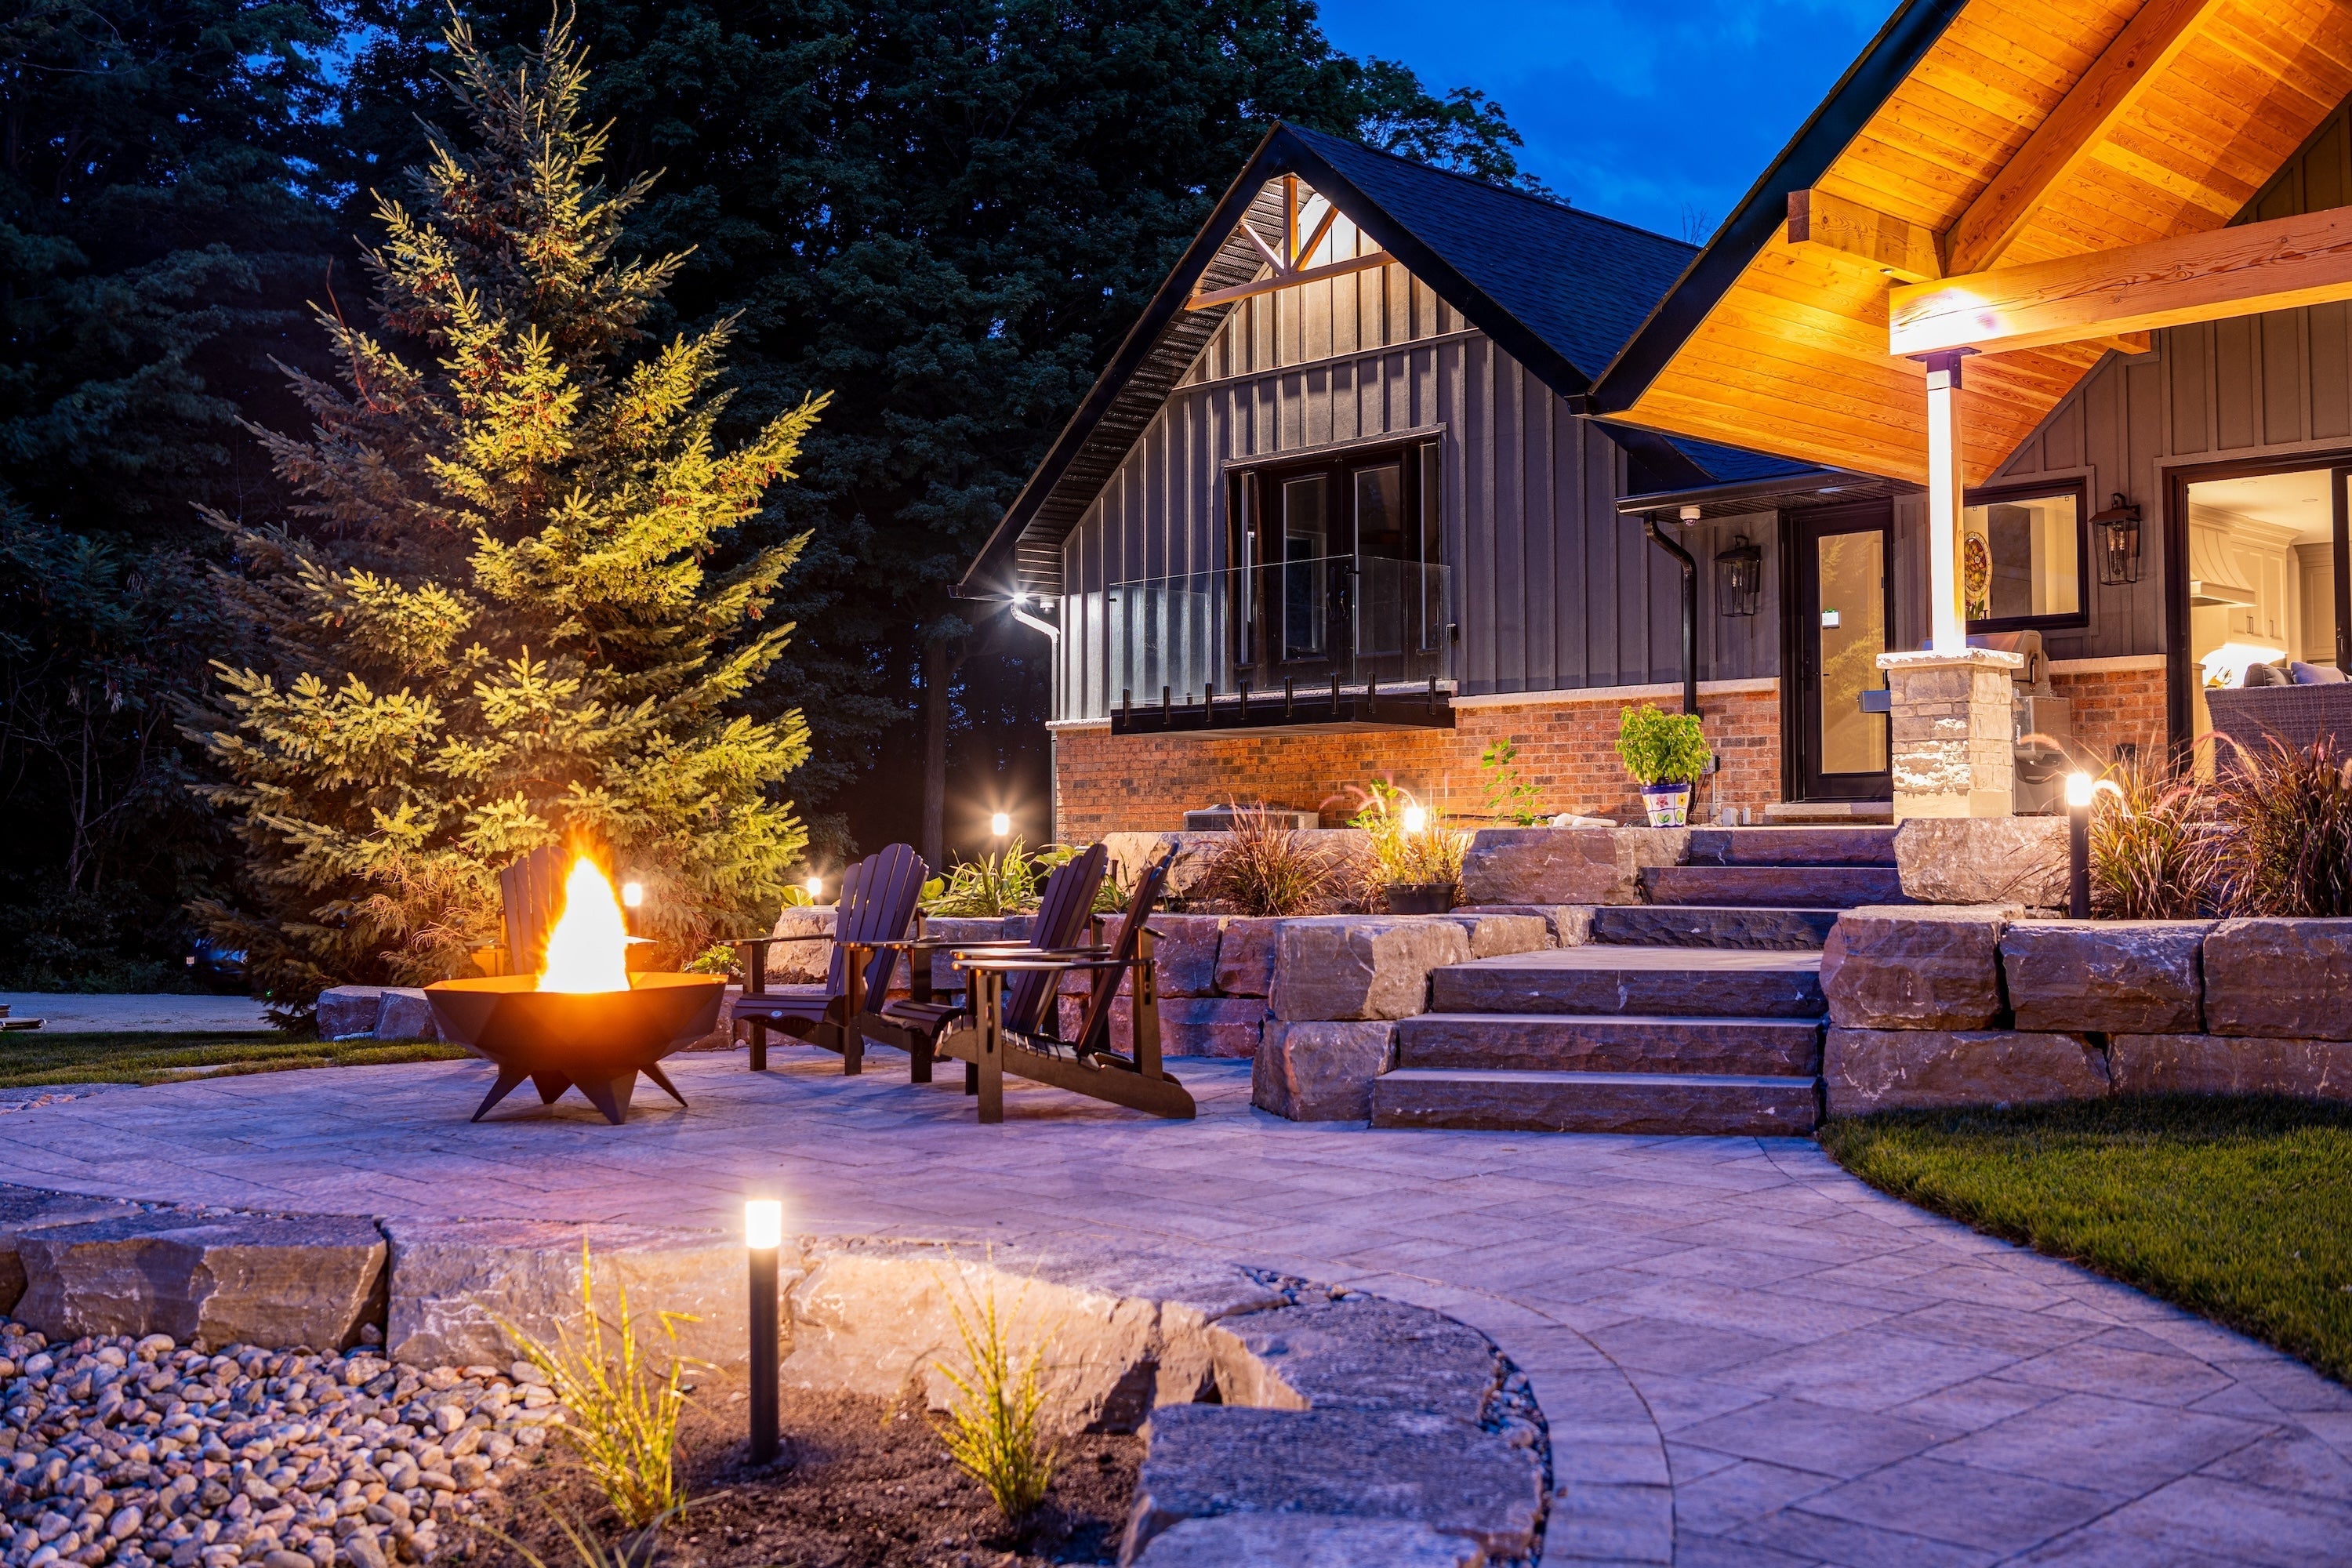
6. Hardscape Lighting:
Overview:
Hardscape lighting is designed to highlight and illuminate outdoor features made of concrete or stone such as pillars, post caps, retaining walls, benches, outdoor kitchens, bars, and firepits. The goal is to accent the design while increasing the visibility, functionality, and ambiance of the space.
Installation Tips:
- Fixture Placement: Install recessed and undercap lights into built elements like steps, fire features, retaining walls, bars, and outdoor kitchens.
- Integration: Conceal or integrate fixtures into the hardscape’s design to maintain a clean and modular look.
Best Practices:
- Use durable, weather-resistant fixtures suitable for outdoor use.
- Opt for fixtures that will blend-in or complement the materials, finishes, and design of the space.
- Aim to achieve an even light coverage and to frame features without creating harsh contrasts, textures, or shadows.
Product Recommendations:
- Undercap lights (Edge series).
- Recessed lights (Diamond, Ruby, Onyx).
- Wall lights (Hero series, Dome series).

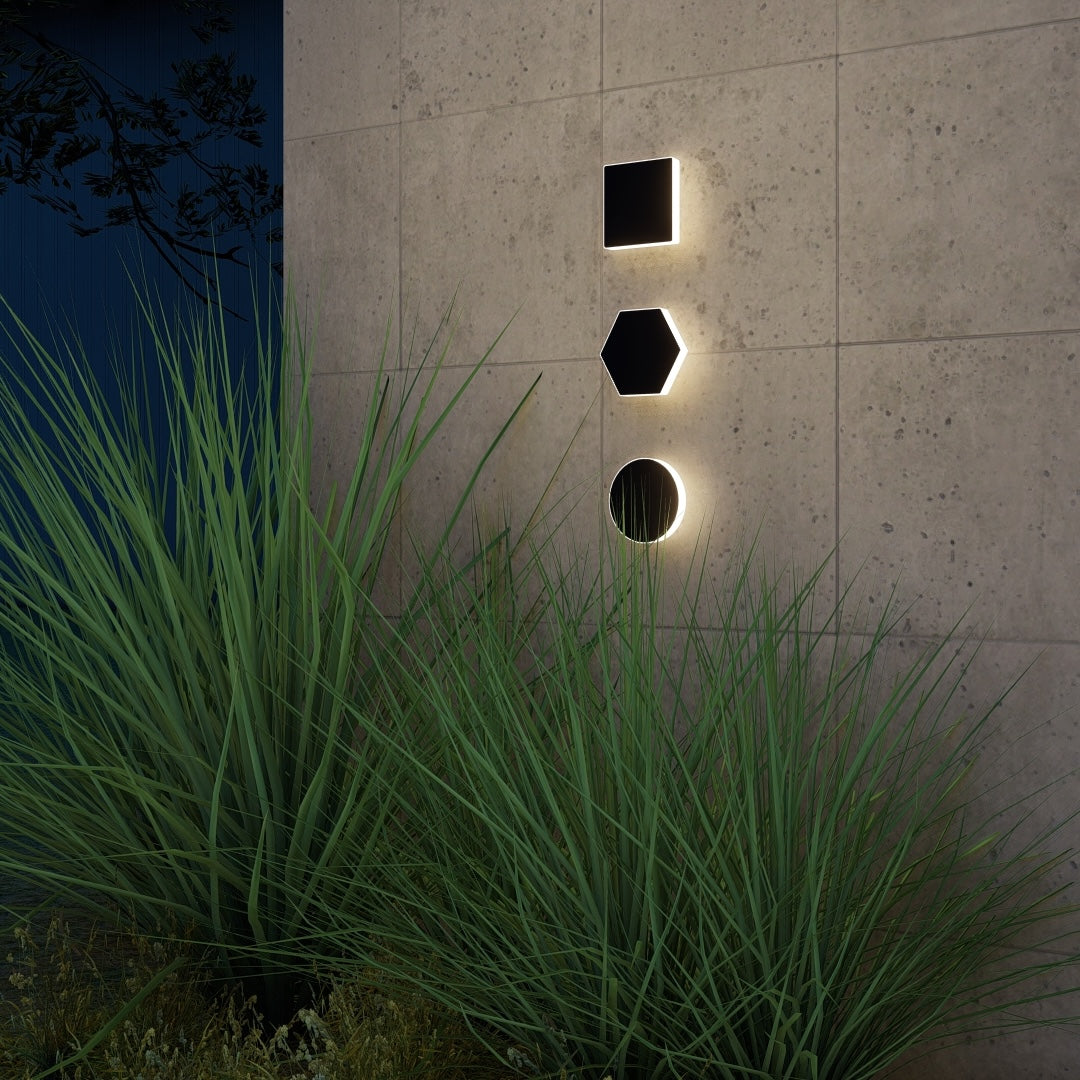
7. Down Lighting:
Overview:
This technique involves illuminating elements by casting a light on them from above aimed toward the ground. Downlights are commonly used to accent walls, fences, pergolas, retention walls, or as ceiling lights to illuminate the ground.
Installation Tips:
- Placement: Play with the height at which you will be installing the light fixture to avoid glare around social areas and use mount accessories when needed to install spotlights as ceiling lights.
- Angle: Play with the angle of the light source to avoid glare or hots spots. The goal is to illuminate down and outwards to enhance the colors and textures of the element and its surroundings, including the ground.
- Spacing: Don't install the fixtures too close together; play with the levels, shadows, textures and effects to achieve balanced and visually aesthetic results.
Best Practices:
- Use fixtures with wider beams to cover larger surfaces like walls and fences.
- Match fixture styles and finishes with the space to add to the design.
- Use fixtures with semi-covered light sources or add shield/diffuser accessories to control glare around social areas.
Product Recommendations:
- Wall lights (Dax Up Down, Hero series, Dome series).
- Undercap lights (Edge series)
- Spotlights (Strata series + Wall Mount).

8. Shadow Lighting (Shadowing):
Overview:
Shadow lighting consists in strategically placing a light fixture in front of an element to cast dramatic or subtle shadows onto the surface behind it. This lighting technique is especially appealing when used on trees, grasses, or bushes that will move with the wind and project dynamic shadows onto the walls or fences behind them.
Installation Tips:
- Fixture Placement: Place the spotlight in front of the element (such as a tree or bush) and direct the light source toward the wall or flat surface you wish to project the shadows onto.
- Angle: Adjust the angle as needed to achieve the desired shadow shape and size.
- Distance: Play with the distance between fixture and the element to modify the shadow’s sharpness (the closer the fixture is to the element, the more dramatic and defined the shadows will look, and vice versa).
Best Practices:
- Use diffused spotlights or shroud/cover accessories if needed to eliminate glare.
- Install the fixtures where they won’t interfere with foot traffic.
- Experiment with light angles and placement to create unique shadows.
- Ensure a clear, uncluttered background for best shadow results.
Product Recommendations:
- Spotlights (Strata series + Reflector accessory).

9. Graze Lighting (Grazing):
Overview:
Graze lighting leverages the power of dramatic shadows to highlight and enhance the textures and patterns of materials like brick, stone, and tree bark. The goal is to illuminate the element directly from above or below to enhance their visual appeal. In this technique, the lighting fixture is placed very close at the base of the element to shine directly up or down vertically, enhancing textures even further.
Installation Tips:
- Fixture Placement: Install fixture as close as you can to the object.
- Angle: Keep the light angle vertical to really accentuate the surface’s textures.
- Spacing: Use multiple fixtures for uniform texture coverage.
Best Practices:
- Use this technique to bring out the textures and patterns of surfaces such as stone, wood or brick walls.
- User narrow-beam lights for more concentrated lighting effects, and wider beams to cover larger surfaces.
- Adjust angles and fixture placement to avoid hot spots.
- Use shields or diffuser accessories to redirect and/or soften the light source.
Product Recommendations:
- Spotlights (Strata series).
- Recessed lights (Ray).

10. Wash Lighting (Washing):
Overview:
Washing provides broad, soft and even illumination across large surfaces or areas such as walls or fences. This technique consists of illuminating a flat surface evenly without any harsh shadows or hot spots.
Installation Tips:
- Fixture Placement: Position fixtures further from the surface to achieve a soft and even wash.
- Angle: Adjust the light angle to spread evenly across the targeted area without hotspots or harsh shadows.
- Spacing: Overlap light beams of multiple fixtures to ensure consistent surface coverage.
Best Practices:
- Use wide-beam fixtures for extensive surface coverage.
- When using spotlights, use shroud or lens accessories to soften the light source and eliminate glare.
- Try using recessed fixtures with angled beams around social or high foot traffic areas to keep the flow of the space undisturbed.
Product Recommendations
- Spotlights (Strata series).
-
Angled recessed lights (Onyx)

Advanced Techniques
11. Moon Lighting
Overview:
Moon lighting mimics the natural light of the moon shining down onto an outdoor space. This technique consists of mounting a fixture very high up a tall tree and aiming the light source downwards to shine through tree branches, casting soft shadows onto the ground below.
The trickiest part about Moon lighting is to achieve the subtle shadow effect on the ground without glare from any viewpoint. The key to avoid glare is to strategically mount the fixture very high up the tree and conceal the light source behind the branches/foliage to soften it. This technique requires more expertise and resources to execute properly.
Installation Tips:
- Fixture Placement: Mount the fixture high up in the tree or structure at least 25 feet or higher from the ground around patios, gardens, walkways, or fire features (the brighter the fixture, the higher up the tree you must go, and viceversa).
- Angle: Aim the light downward to create soft and diffused lighting effects onto the ground (the tip-out angle of the fixture should be around 35 degrees to eliminate glare).
- Spacing: Ensure the fixture is mounted high enough up the tree to achieve a natural, moonlit ambiance.
Best Practices:
- You might have to outsource an arborist to properly install the fixture and execute this technique.
- Smaller/less potent spotlights with a single diode work best for moon lighting.
- Avoid harsh shadows and glare as much as possible by concealing the fixture behind foliage and branches (over-lighting is worse than under-lighting).
- It is important to adjust the light angle and maintain the fixture through seasonal changes and as the tree grows over time.
- Use lens cover accessories or shrouds to redirect and reduce to soften the light source if necessary.
Product Recommendations:
- Spotlights (Strata S + Wall Mount Accessory).

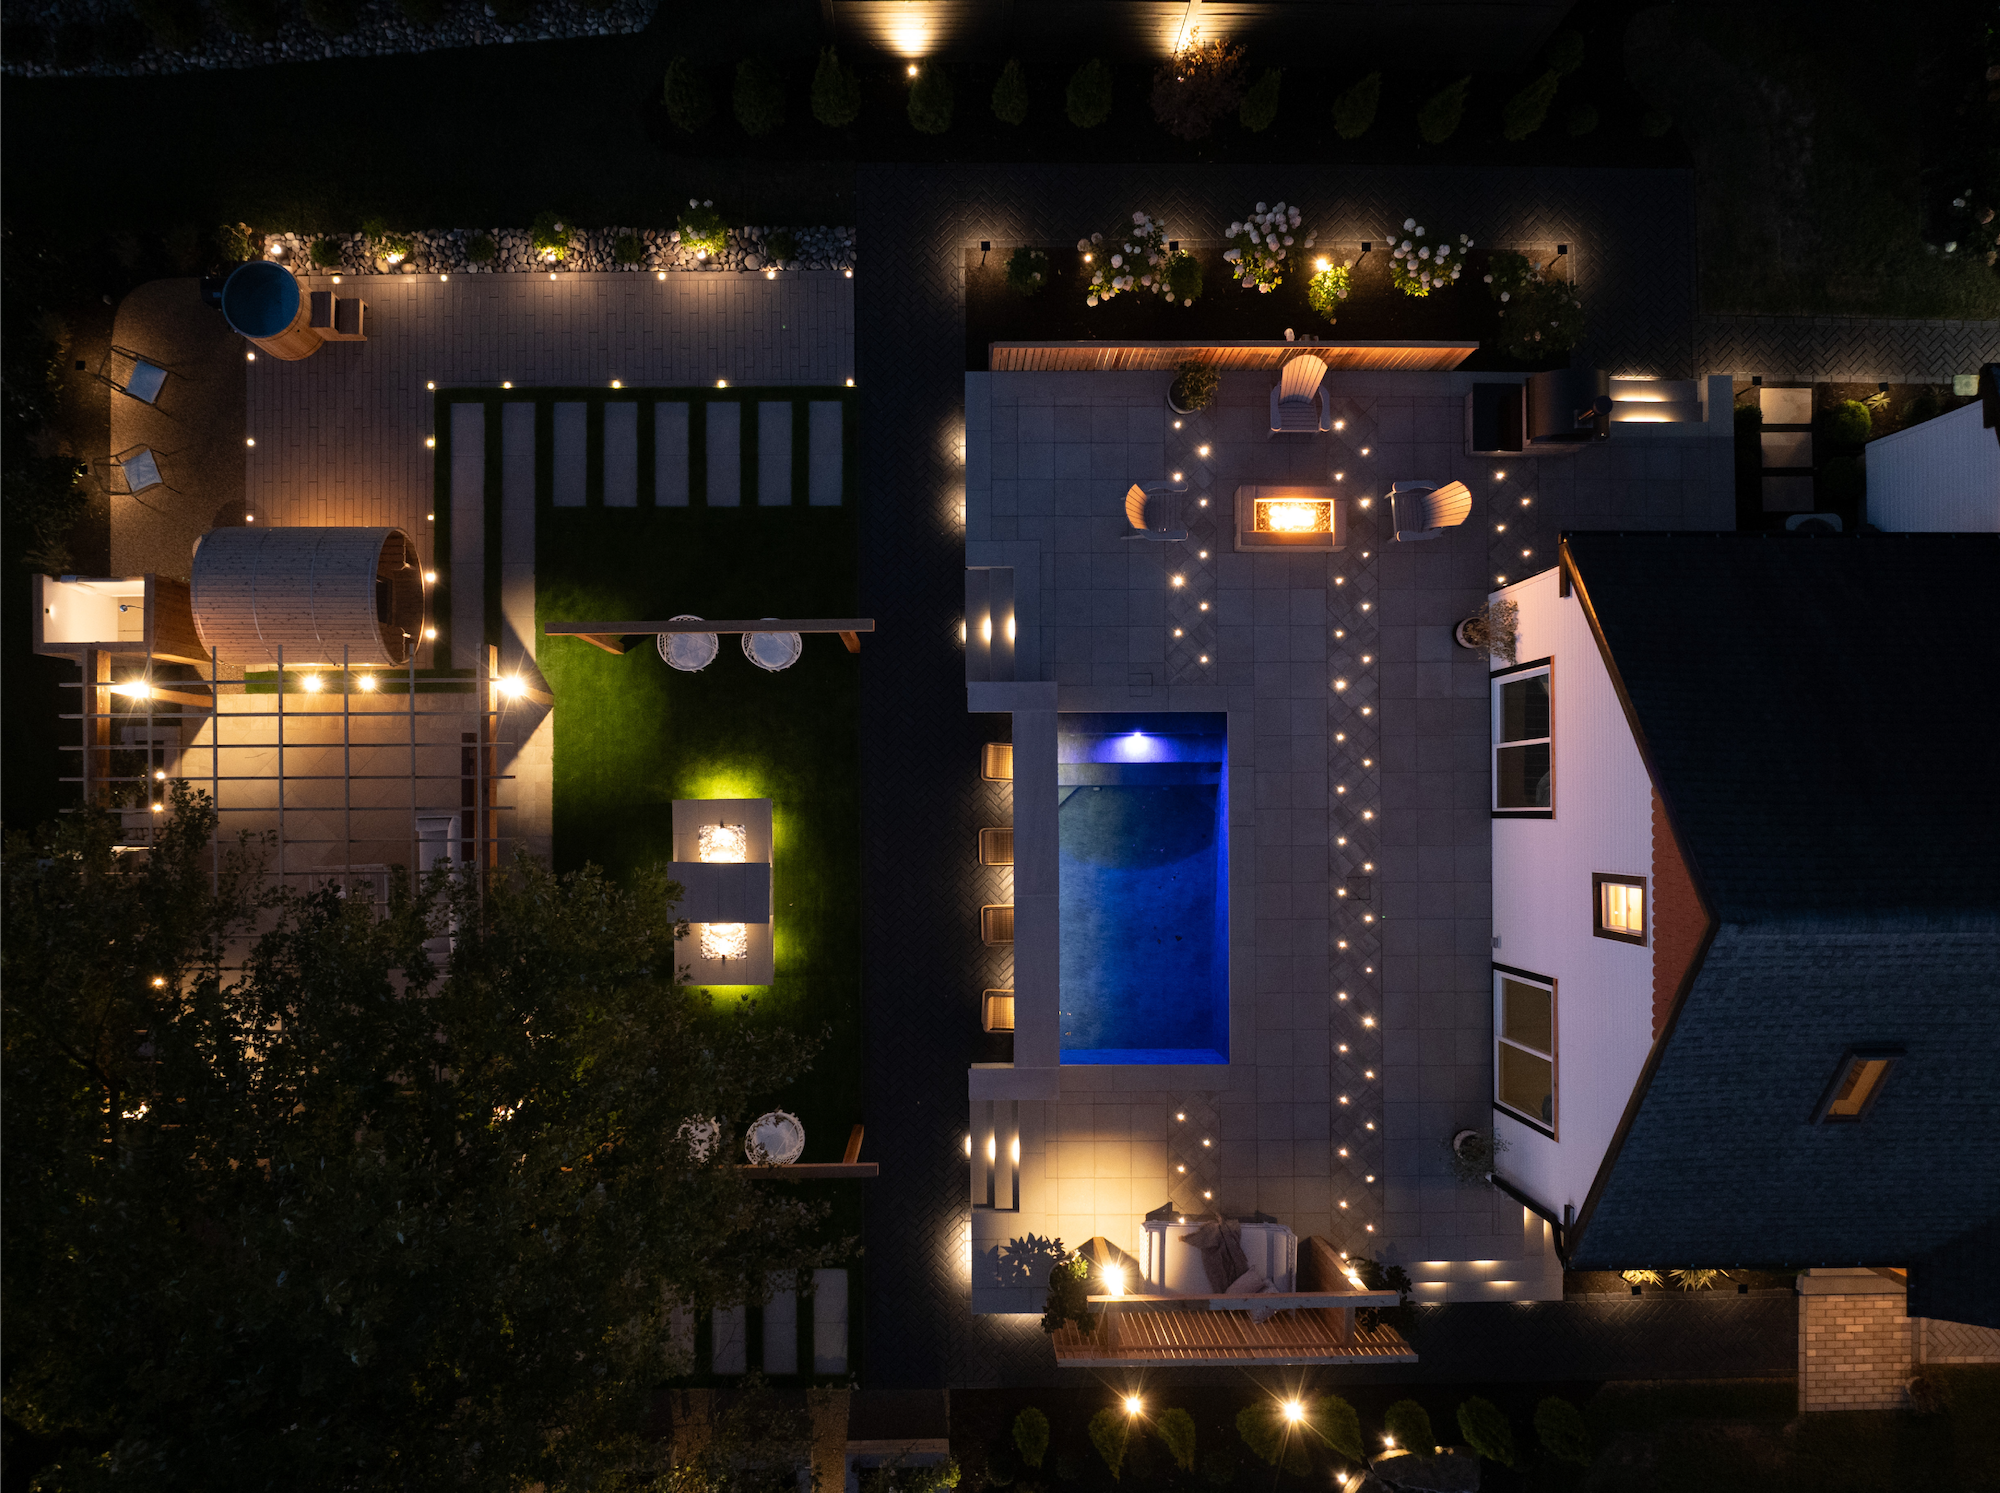
12. Mirror Lighting:
Overview:
Mirror lighting involves illuminating objects strategically near a reflective surface -like a tree or structure near a pool or pond- to create unique lighting effects and enhance the colors, visibility, and aesthetic appeal of an entire outdoor space.
Installation Tips:
- Fixture Placement: Position lights to fully illuminate an object near a reflective surface.
- Angle: Adjust the light angle as needed to minimize glare and maximize light coverage, colors, shadows, and textures.
- Spacing: Use multiple lights to illuminate the object completely avoiding hotspots.
Best Practices:
- Use fixtures with high CRI for accurate color reproduction at night.
- Conceal fixtures as much as possible to maintain a clean space.
- Use shields or lens cover accessories as needed to prevent glare bombs.
Product Recommendations:
- Spotlights (Strata series).
- Recessed lights (Starke).

Conclusion
Mastering these landscape lighting techniques can elevate your projects, impress clients, and enhance your professional reputation. Whether you’re implementing uplighting to accentuate a tree, downlighting for a natural ambiance, or path lighting for safety, each technique requires careful consideration and precise execution. For top-quality landscape lighting solutions and expert advice, visit BOLD and explore our extensive range of products designed to meet the needs of professional contractors and installers.
If you have questions about this blog, or if you want to learn more about BOLD and our products, you can reach out to us at support@boldpros.com or give us a call at 1-833-472-9960.